
Changing from 18inch to 19.5 inch
As promised, here is the post about the major RV wheel and tyre replacement. For those that haven’t read the post on the High Speed Tire Blowout, this is the follow-up.
Reason for complete wheel replacement
I got the idea that the tires on my motorhome were either insufficient to handle the weight or the conditions. The tires were quite old, even though the tread was like new. Other factors came into play as well. The tyres were “Snow” type. Snow tyres – as the word states – are not really made to handle 25+ degrees celcius. The bus was originally built to carry 37 passengers with some luggage – not 10 tonne all up.
Even so, the old tyres kept going for allmost 10 years. Lately, I had a lot of tire issues which was the sign to get new ones. The only problem, 18inch tires are no longer manufactured and there very limited amounts of new ones are left in New Zealand at exorbitant prices.
The crazy search
This brought about a search for a needle in a haystack. To find a more common size wheel and tire to fit a Nissan RM210 bus is no exactly a “walk in the park”. I spoke to numerous people, contacted numerous companies and spent hours online to try and find answers.
Allmost like “Scratch & Win”, I scratched through all the websites I could find for info, and I won!!
I found a company that has 19.5 inch steel rims with the same stud pattern and PCD to fit my bus.
I immediately had one rim sent up to the local tyre shop to check it out.
As Murphy would have it, the steel rims had a smaller circumferance in the middle where the dish is welded on, possibly for strenght purposes. This bulge caught on the lip of the brake drums and would not slide over.
After some more searching and calls, someone told me that the drum lip can be ground down.
The job from hell
This seemed like my only option. I got my bus into the yard at my workplace.
The next issue was to get the wheel nuts undone. The following pictures will do some of the talking…
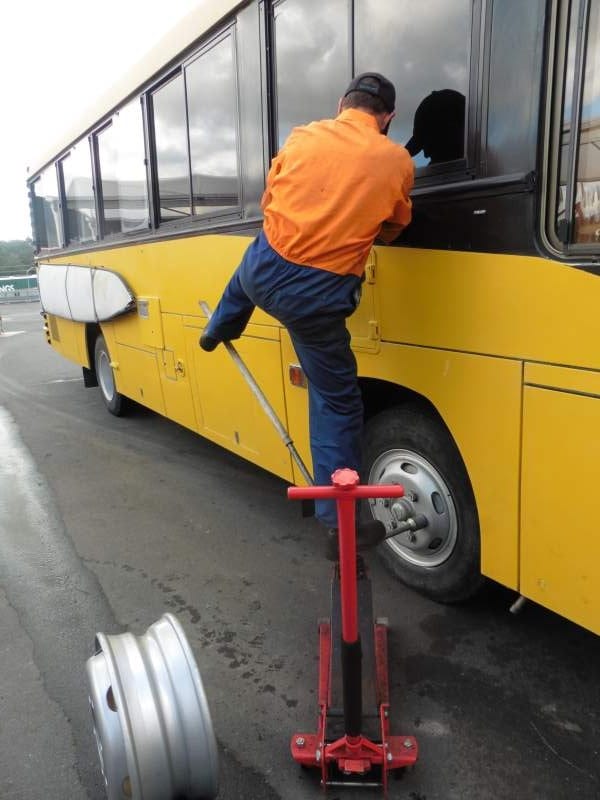
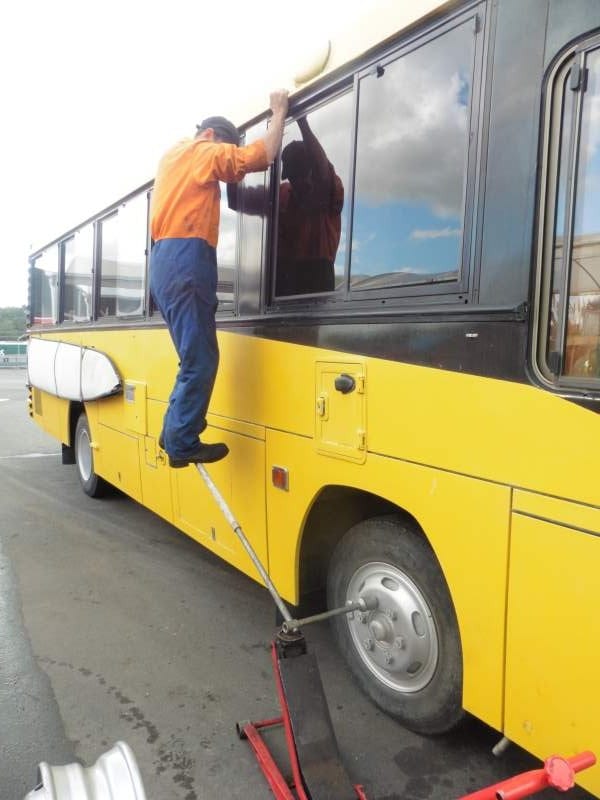
As can be seen in the pictures, I had to make some plans to get the old wheels off. This was the biggest job of the day. It literally took hours.
The next biggest job was using a disc grinder to carefully grind approximately 3mm off the edge of the cast iron brake drum lip. The lip was about 20mm wide and the circumference never ending.
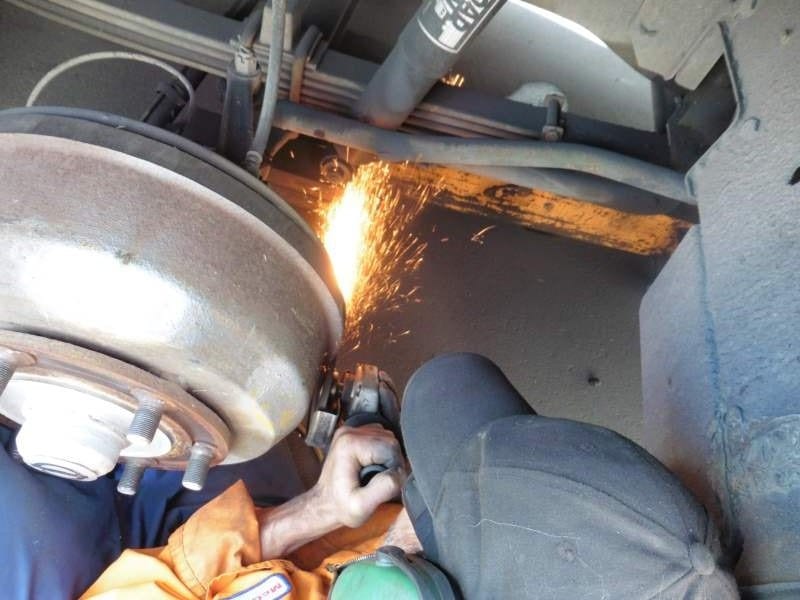
The grinding dust went everywhere. The big mistake I realized many days later is that I should have washed the bus immediately after this excursion, but it got late and I felt like I was hit by a train. The grinding dust started rusting from the early morning dew and streaked the bus, tarnishing the paint in various places all around.
I tried in vain to remove it by polishing. It looks like that is going to speed up the respray project that I was planning for some months.

Once all 4 drums were done, the dreaded job of refitting the old wheels, started – a reversal of the original removal proccess. I booked the bus in to have the new rims and tires fitted and balanced at the local tire shop.
The BIG Difference
Immediately, when hitting the road, I could feel a major difference in stability. The bus didn’t lean over nearly as much as it used to. The ride was softer too. The old tires were narrow with a very high profile, causing severe sidewall flex and side-to-side drift. These wider, lower profile tires don’t do that.
Oh, before I forget, I fitted GiTi GTR923 tires on the front and Advance GL 283A’s on the rear. That was recommended by a tire guru.
Must say, it really was worth the dollar!! It just feels so much safer and easier to drive. Keeping in mind that this is my house, makes sense doesn’t it?
If anyone would like to get more info, you’re welcome to grab the email address on the contact page or use the comment field below.

Great ? story ..what a job..
Hi Tiny,
Thanks for your comment and interest.
Always welcome.
Regards
Noah
You can say that again…thanks for your visit.